Alistair Potter's RC plane tips.
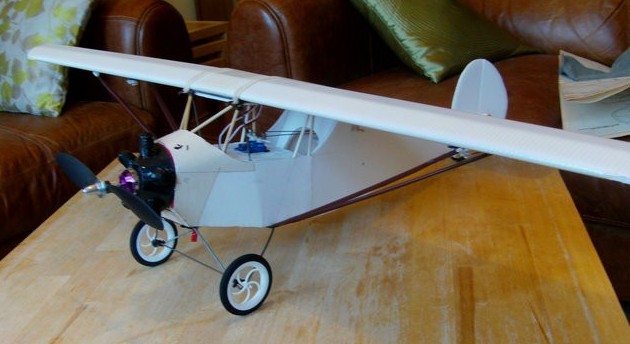
1927 Velie Monocoupe – Type 70
Back to planes list. Back to homepage.
Wingspan – 1000 mm 39 inches.
Length – 620 mm 24.5 inches.
AUW – 980 grams 34.5 ozs.
Drive – D2380 1000KV 21A motor with 9 x 4.7 prop.
This video is a quick history of the build and its ups and downs. I will add that this was also early in my flying career, so I was still learning a lot of basic flight techniques, and developing a better understanding of the hobby. Up to 3:00 minutes in the video it's all test and development – from there on it's smooth flying!
But where did it all start?
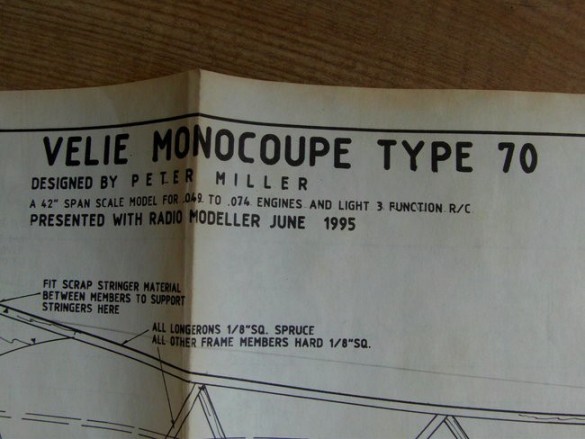
I spotted this plane when searching the web for high–wing vintage monoplanes. I followed a link and ended up at a build article from the June 1995 Radio Modeller of a plan created by Peter Miller. I think it’s a lovely looking plane, and with fairly square sides I knew it would work well in foam board. I was lucky to find an old copy of the magazine, still with its pull–out plans.
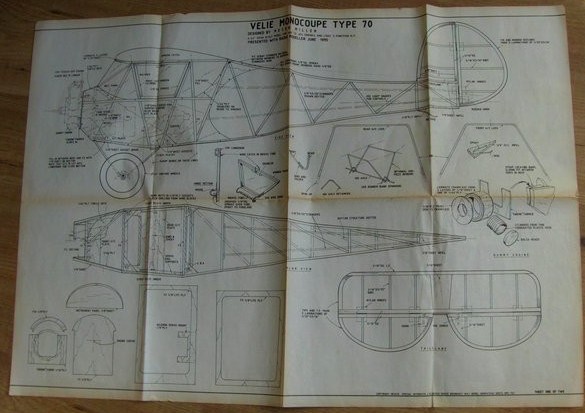
I was able to lift all the basic profiles for the fuselage, elevator, wing and rudder from the plans. I just photocopied the bit I wanted, cut it out and used it as a template to draw around. I modified the rudder and elevator using detail from other Flite Test builds like the Baby Blender.
I was a bit keen to finish the build and didn't keep a good record of the process, but there are a few features worth mentioning.
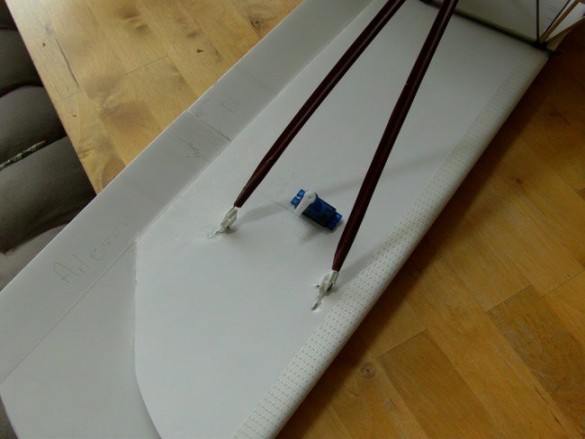
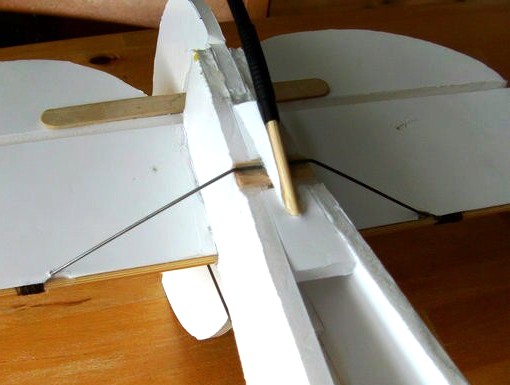
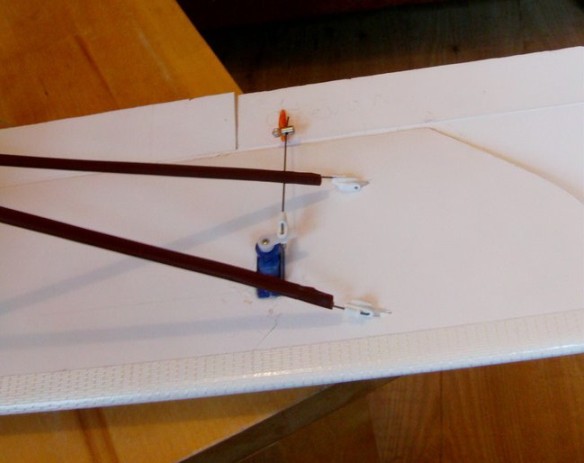
I used the FT Cruiser wing design, modifying the outline and scaling it to fit this plane, and added attachment points for the wing struts. These were spare servo arms pushed through the bottom layer of foam board with lengths of skewer through the 'fat' end to stop them pulling through. Only the thin end of the servo arm sticks out. The wing struts are skewers with wire ends glued onto them with thread and CA. With such a large wingspan these are structural not cosmetic. At the wing ends it was a no–brainer to use swing–in keepers to fit the wire to the ends of the servo arms. At the inboard end I created a wire loop that is screwed to the MDF (Medium Density Fibreboard) pad. I folded brown insulating tape around the skewers and back onto itself and then snipped the ends to mimic the real fairings.

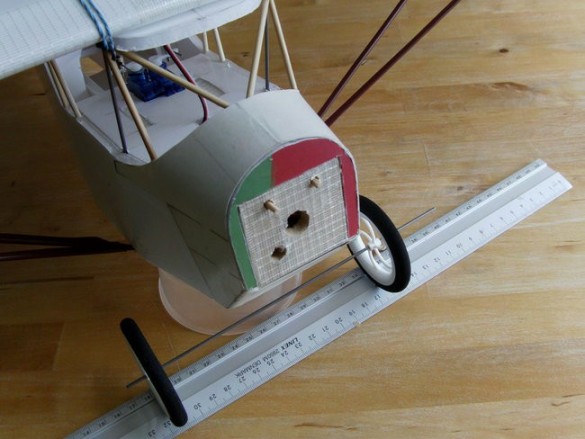
I included two 6mm MDF base plates for attaching the undercarriage and wing struts. In a rebuild I'd replace the front bit with foam and use elastics to hold the front end of the undercarriage frame. This fixed system pushed too many shocks into the nose, causing damage to the fuselage, where an elastic fixing would have allowed a bit of give.

This tail detail should be very familiar to anyone who has built the later Baby Blender. The tailskid is two short lengths of skewer with a spring from a biro pen between them. This is held together by a length of heat–shrink tubing. This arrangement gives a little 'bounce' and in theory allows some steering. On a rebuild I'd just have a short length of skewer and omit a lot of these weight–increasing details. Due to the very short nose projection, the maths is pretty grim, requiring significant ballast to counteract even tiny weights on the tail.
Because the tail was quite narrow I glued a skewer cross–brace into the leading edge of the horizontal stabiliser. Thin wire is glued onto this skewer with thread and CA and runs over the fuselage on a pad made from a short length of popsicle stick. Experience has shown that these foam board tails are stronger than they look. Again, on a rebuild I would omit this detail to save tail weight.
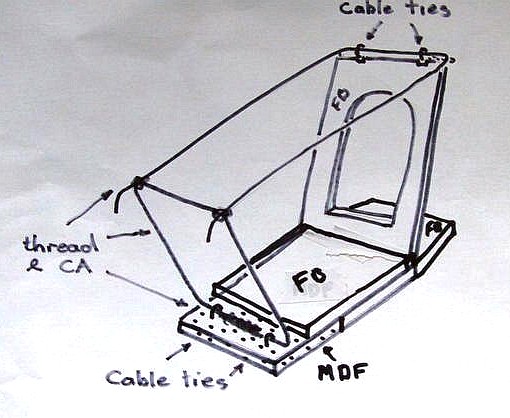
The Peter Miller plans includes wire detail for the wing support – the above sketch shows how I integrated a similar wire assembly into the foam fuselage using an MDF (medium density fibreboard) pad. The top is an elongated U shape with downward facing horns at the front to hook the wing elastics onto. The upright at the front is a rectangle with an overlapping join hidden away at the bottom. The small MDF plate is a key structural part of this model – allowing for the screw–on attachment of the wing cabanes and the rear of the undercarriage frame. At the back I glued a skewer to the top of the foam board bulkhead and used cable ties and glue to fix the wire to the skewer. Unlike the front, which handles the full wing forces, this rear fixing just stabilises the frame, the actual wing forces are taken by a skewer passing through the fuselage.
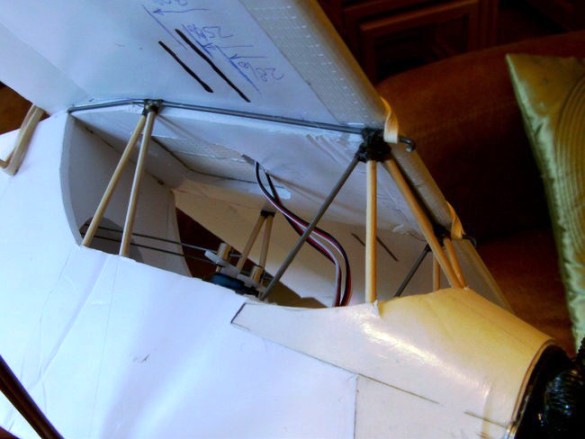
Additional cosmetic frames around the cabin were created using skewers hot glued into the foam board and lashed onto the wire frame with thread and CA. Here you can also see the wing elastic around the wire hook at the front and around the more familiar skewer at the back. The wing locates into the wire using a shaped foam board pad glued onto the underside of the wing.
The front fuselage bulkhead was double thickness foam board with a staggered cut–out at the top to accept the swappable pod mounting skewers and give a flush fit. The turtledeck nose detail took a few attempts. It’s not quite right (according to the Peter Miller plans) but I’m happy enough with it.
You can see how neatly the swappable pod fits and inside the cabin you can also see the servo tray with holes for the swappable pod lugs. In a rebuild of this plane I would place the servos as far forward as possible to help with the balance. I'd also use a custom power pod, reducing its length to a minimum to eliminate as much tail moment as I could.
Just like the FT Cruiser, the aileron servos are bedded into the bottom of the wing with the servo wires feeding through to the middle. This detail could be neater with the servo placed on its side and inside the wing. The same is true for flap servos if they were fitted. In its reincarnation as the Morphocoupe bush plane I eventually fitted flaps which added a whole lot more flying interest. The Monocoupe flew very nicely without flaps, but with flaps I think it would get close to STOL properties due to the large wing area.
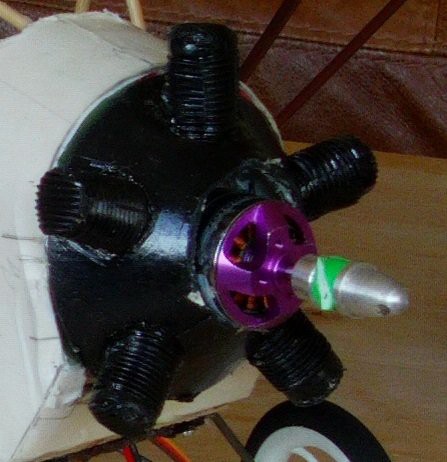
The radial engine was a bit of fun. I used cereal box cardboard for the cone and for the tubes that stick out to make the cylinders. Then I used the flexy bits from 'fat' bendy straws for the cylinder detail. Loads of hot glue and CA helped stick it all together. It's held in place with little magnets. This is an early post–crash picture. I switched to prop saver mounts after this and stopped breaking so many props. The bendy straws give great fin detail, but I've seen plenty of dummy motors at this scale that just used a plain black cylinder.
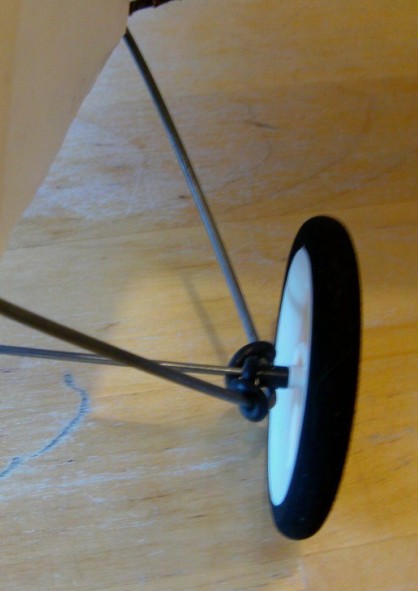
I copied the landing gear suggestion from the original build and used rubber band springing for the undercarriage (actually a twisted prop–saver).
Initial covering was a double coat of odourless HAIRSPRAY. This is silicone based. It ‘showerproofs’ the paper and dries very fast. Fine for most flying, but it wasn't completely fog and soggy–grass proof. I later applied a few coats of satin spray varnish.
The Peter Miller build article in balsa and other traditional materials suggests an all–up weight of 29ozs. Initially I thought I was coming in well under that but after adding balance weights it was a little over that figure. Simplifying the construction, especially around the tail, would pull that final weight down again.
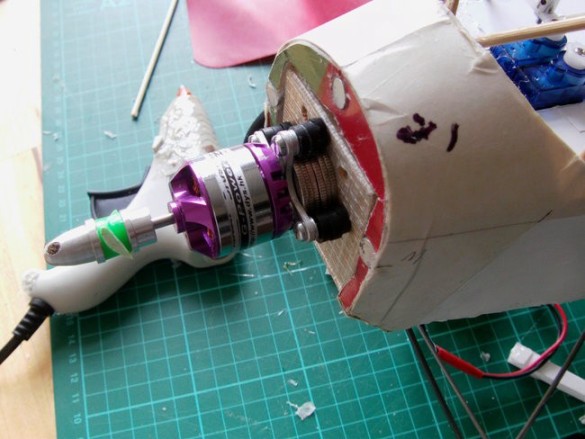
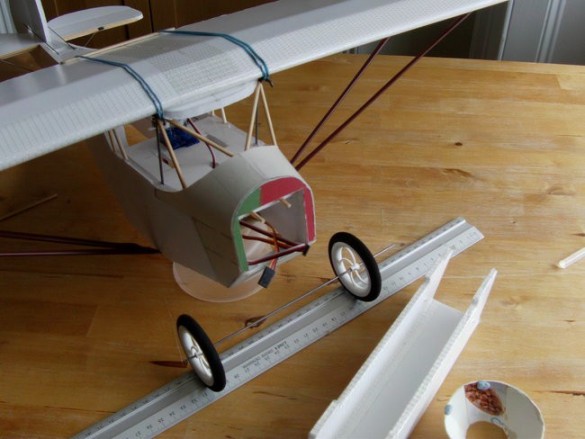
My first flights were a bit of a disaster as the plane was tail heavy and I was fairly new to RC flying. To address the balance problem I re–mounted the motor off the firewall on a stack of washers, and dropped some coins into the space at the back of the motor. I also shifted the wing back about 10mm. In this picture you can also see the magnets that hold the dummy engine in place.
That modification did the trick and got the plane flying. I had some very rewarding flights but also a series of transmitter/receiver related problems that caused a few crashes. Most of the time it was easy enough to get the plane back in the air, but eventually the wear and tear became too much and I decided on a significant rebuild, re–using the core components around the cabin and wing assembly to create the Morphocoupe.