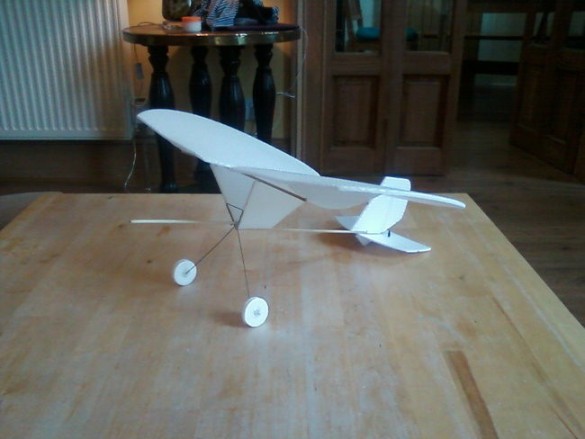
Experimental Indoor flyer.
Wingspan -
Length -
AUW - 61 grams 2.125 ozs with a 150mah LiPo
Drive -
This project was to create an indoor flyer. Looking around the house for suitable materials I spotted 3 foam circles in our recycling box. These are the bases that go underneath frozen pizzas. I also had a pile of BBQ skewers from the Flite Test swappables builds and my trusty hot glue gun.
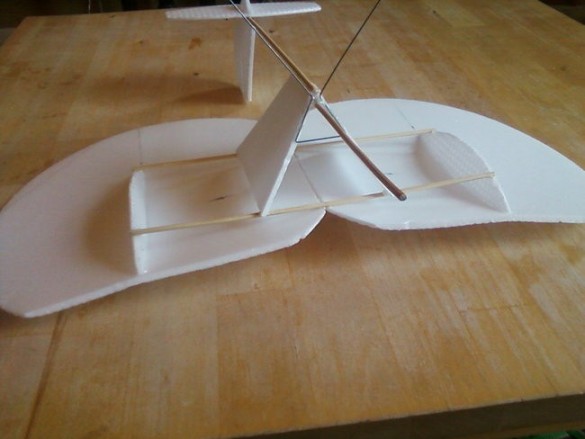
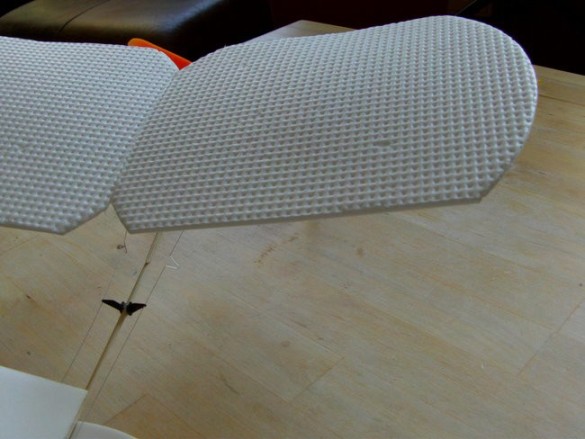
The wings were first. Holding two of the bases overlapping I saw a pretty obvious way to use them. First I cut leading edges, then I cut identical mating edges for the centre of the wing. Initially I thought to use those removed edges as my aerofoil formers. But when I tried it, it was too severe a curve. Instead I trimmed the straight edge of two of the pieces to make a gentler curve (it didn't seem to take much to create a curve in the wing, so I just decided on one former per wing).
I positioned the formers to touch the leading edge, which left a long trailing edge of the wing to do what it wanted –as luck would have it, it made a nice reducing curve that finished the wing beautifully.
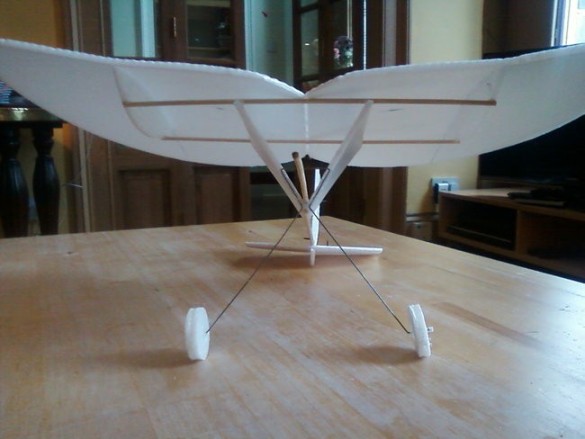
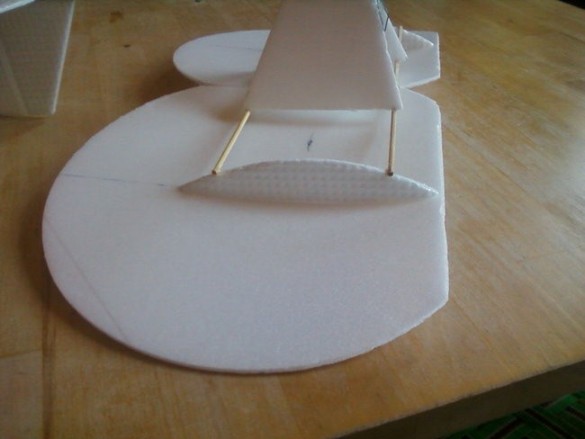
Having glued the two aerofoil formers to each wing I then thought about dihedral – and would you know it, the original curved edges I'd left on the formers made perfect mounting points for two BBQ skewer cross braces, and allowed the wings to 'fall' into a natural dihedral. Some careful gluing soon had the wings stiff and stable.
At that point it seemed natural to glue on two side panels to form a strong triangular box fuselage element. I tapered mine from the two cross braces, but at this stage you could really make them any shape you want to create the outline of a cabin and tail fuselage? This foam weighs next to nothing, so I doubt it would matter much. Just go easy on the glue. When I joined the two halves of the wing I used spots at 3cm intervals.
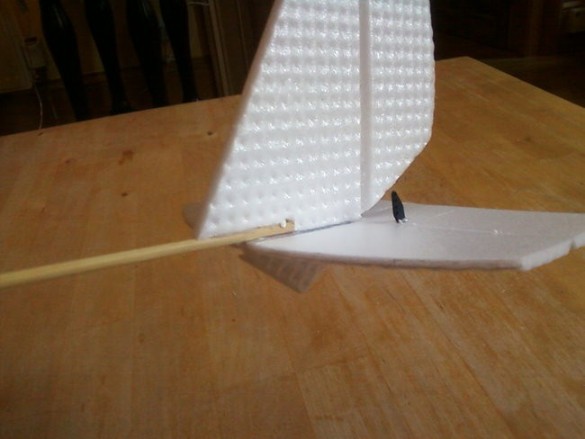
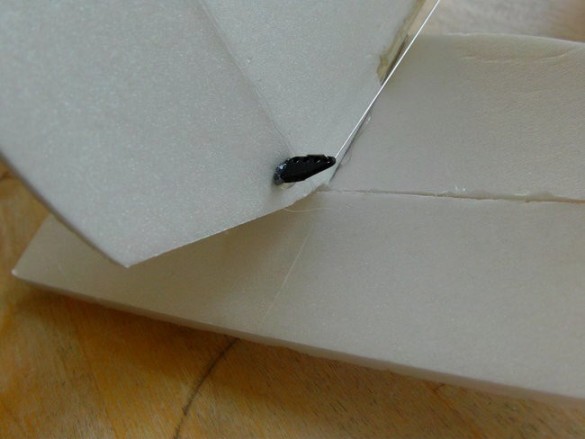
The tail was guesswork, but seems about right. The hinges followed the standard foam board bevelling technique. I thought I'd have to tape the hinges, but as a folded the cut joint open the last thin layer of foam hung on to make a hinge. I don't know if this will last, but if it doesn't I can just use tape.
I made the tail up completely, ensuring it was all straight and true before joining it to the fuselage. Sizes conformed to the – cut the pointy end off the BBQ skewer and use what's left system. Again, it looks about right. I stuck on another BBQ skewer pointing forward. I intentionally left it long for the next stage of glide testing. With a good big blob of blue tack on the nose, this thing glides beautifully. I used those glide tests to establish my CG and marked it on the wings.
Wheels were the pizza foam laminated and joined using double sided carpet tape. Axle bearings were the poly tube nipped from the top of the ink reservoir pipe in cheap ball point pens. The cheaper, the narrower the centre hole, and the better the fit on the wire axle.
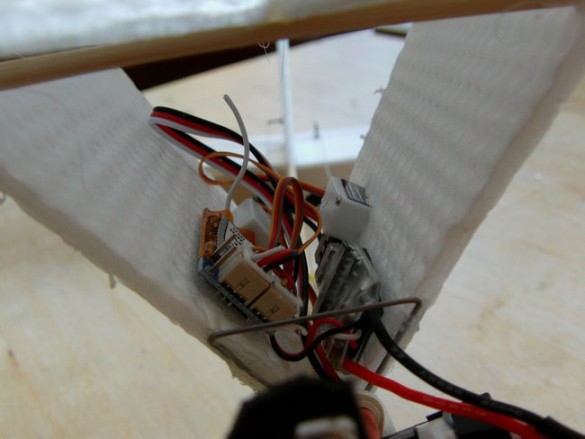
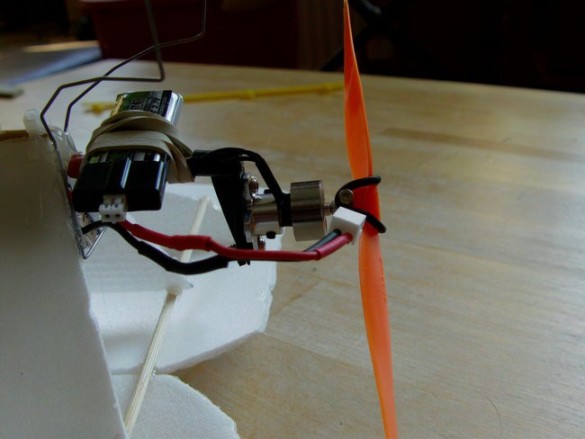
I ordered up servos, a motor/gearbox, battery, props and ESC from HobbyKing. What I wanted wasn't available in their UK store, but it was still cheaper for me to pay International postage than to source them in the UK. I already had a tiny OrangeRx R415 Spektrum DSM2 Compatible 4Ch Micro Receiver from HobbyKing which I successfully bound to a Hobby Zone transmitter I picked up for £10 on Ebay (an earlier experiment in RC).
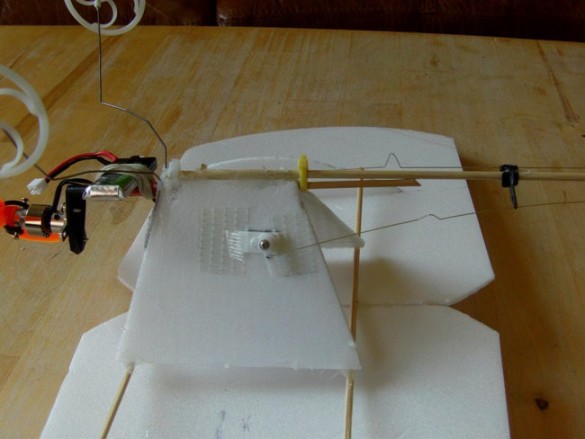
I mounted the servos in my fuselage sides, and tucked the receiver and ESC inside the fuselage. The motor is mounted on a tail wheel bracket with a skewer through where a wire would normally pivot. The skewer is held by two zip ties (yellow and white) and can be slid forward and back to adjust balance.
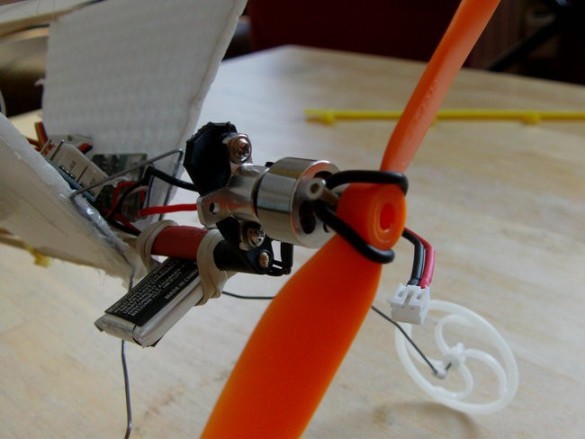
I screwed the motor to a tail steering bracket and pushed it onto the end of the skewer.
Notice the high tech method of attaching the battery!
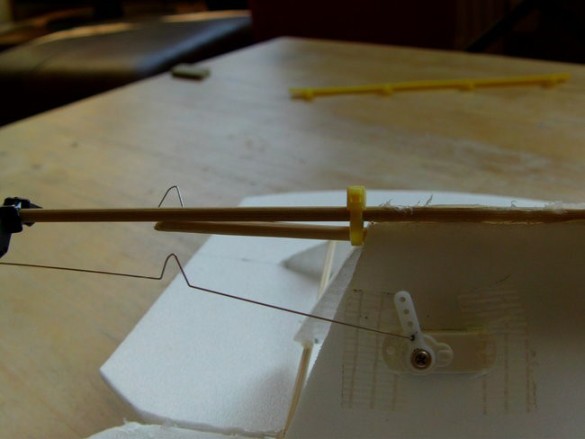
Servos are taped in place, and I used an electric guitar string for the pushrods.
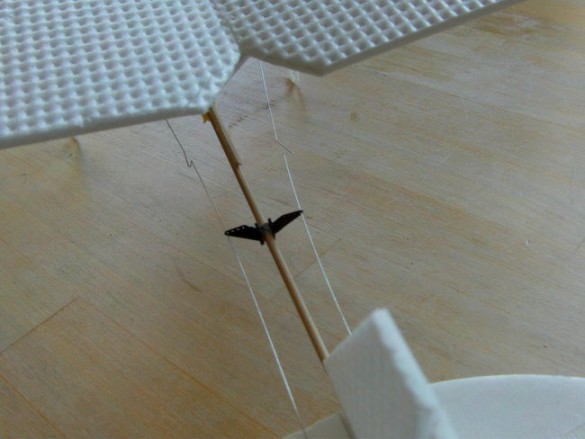
I've used a couple of control horns as mid point supports to eliminate some flex.
The actual control horns are just tiny things;
When I found the motor was struggling, I modified the wings by cutting off the back edge to reduce drag.
I flew this outdoors in zero winds, but it's just marginally viable and barely stays aloft. Here's the flight footage;
My problem was ignorance when I bought in the components. The first motor wasn't strong enough. This is my second motor which in theory can produce 90gms of thrust which should be PLENTY. However as I'm running on a 1S battery, this replacement motor isn't developing the power and revs that it should. Now I could switch to a 2S battery, and I'd get the thrust I need, but I STUPIDLY bought servos that can only handle a 1S setup I believe it's possible to reduce the power to the servo using diodes? Anyway, it was an interesting exercise. My next build using this recycled foam was a mini Staggerwing, which was much more successful.